カスタムフィールドとは
記事の投稿でデフォルトではタイトルや本文のみしかありませんが、オリジナルのフィールド(情報を入力できるボックス)を設定することができます。
- WordPressに詳しくない人でも編集がしやすくなります。
- データ管理しやすくなります。
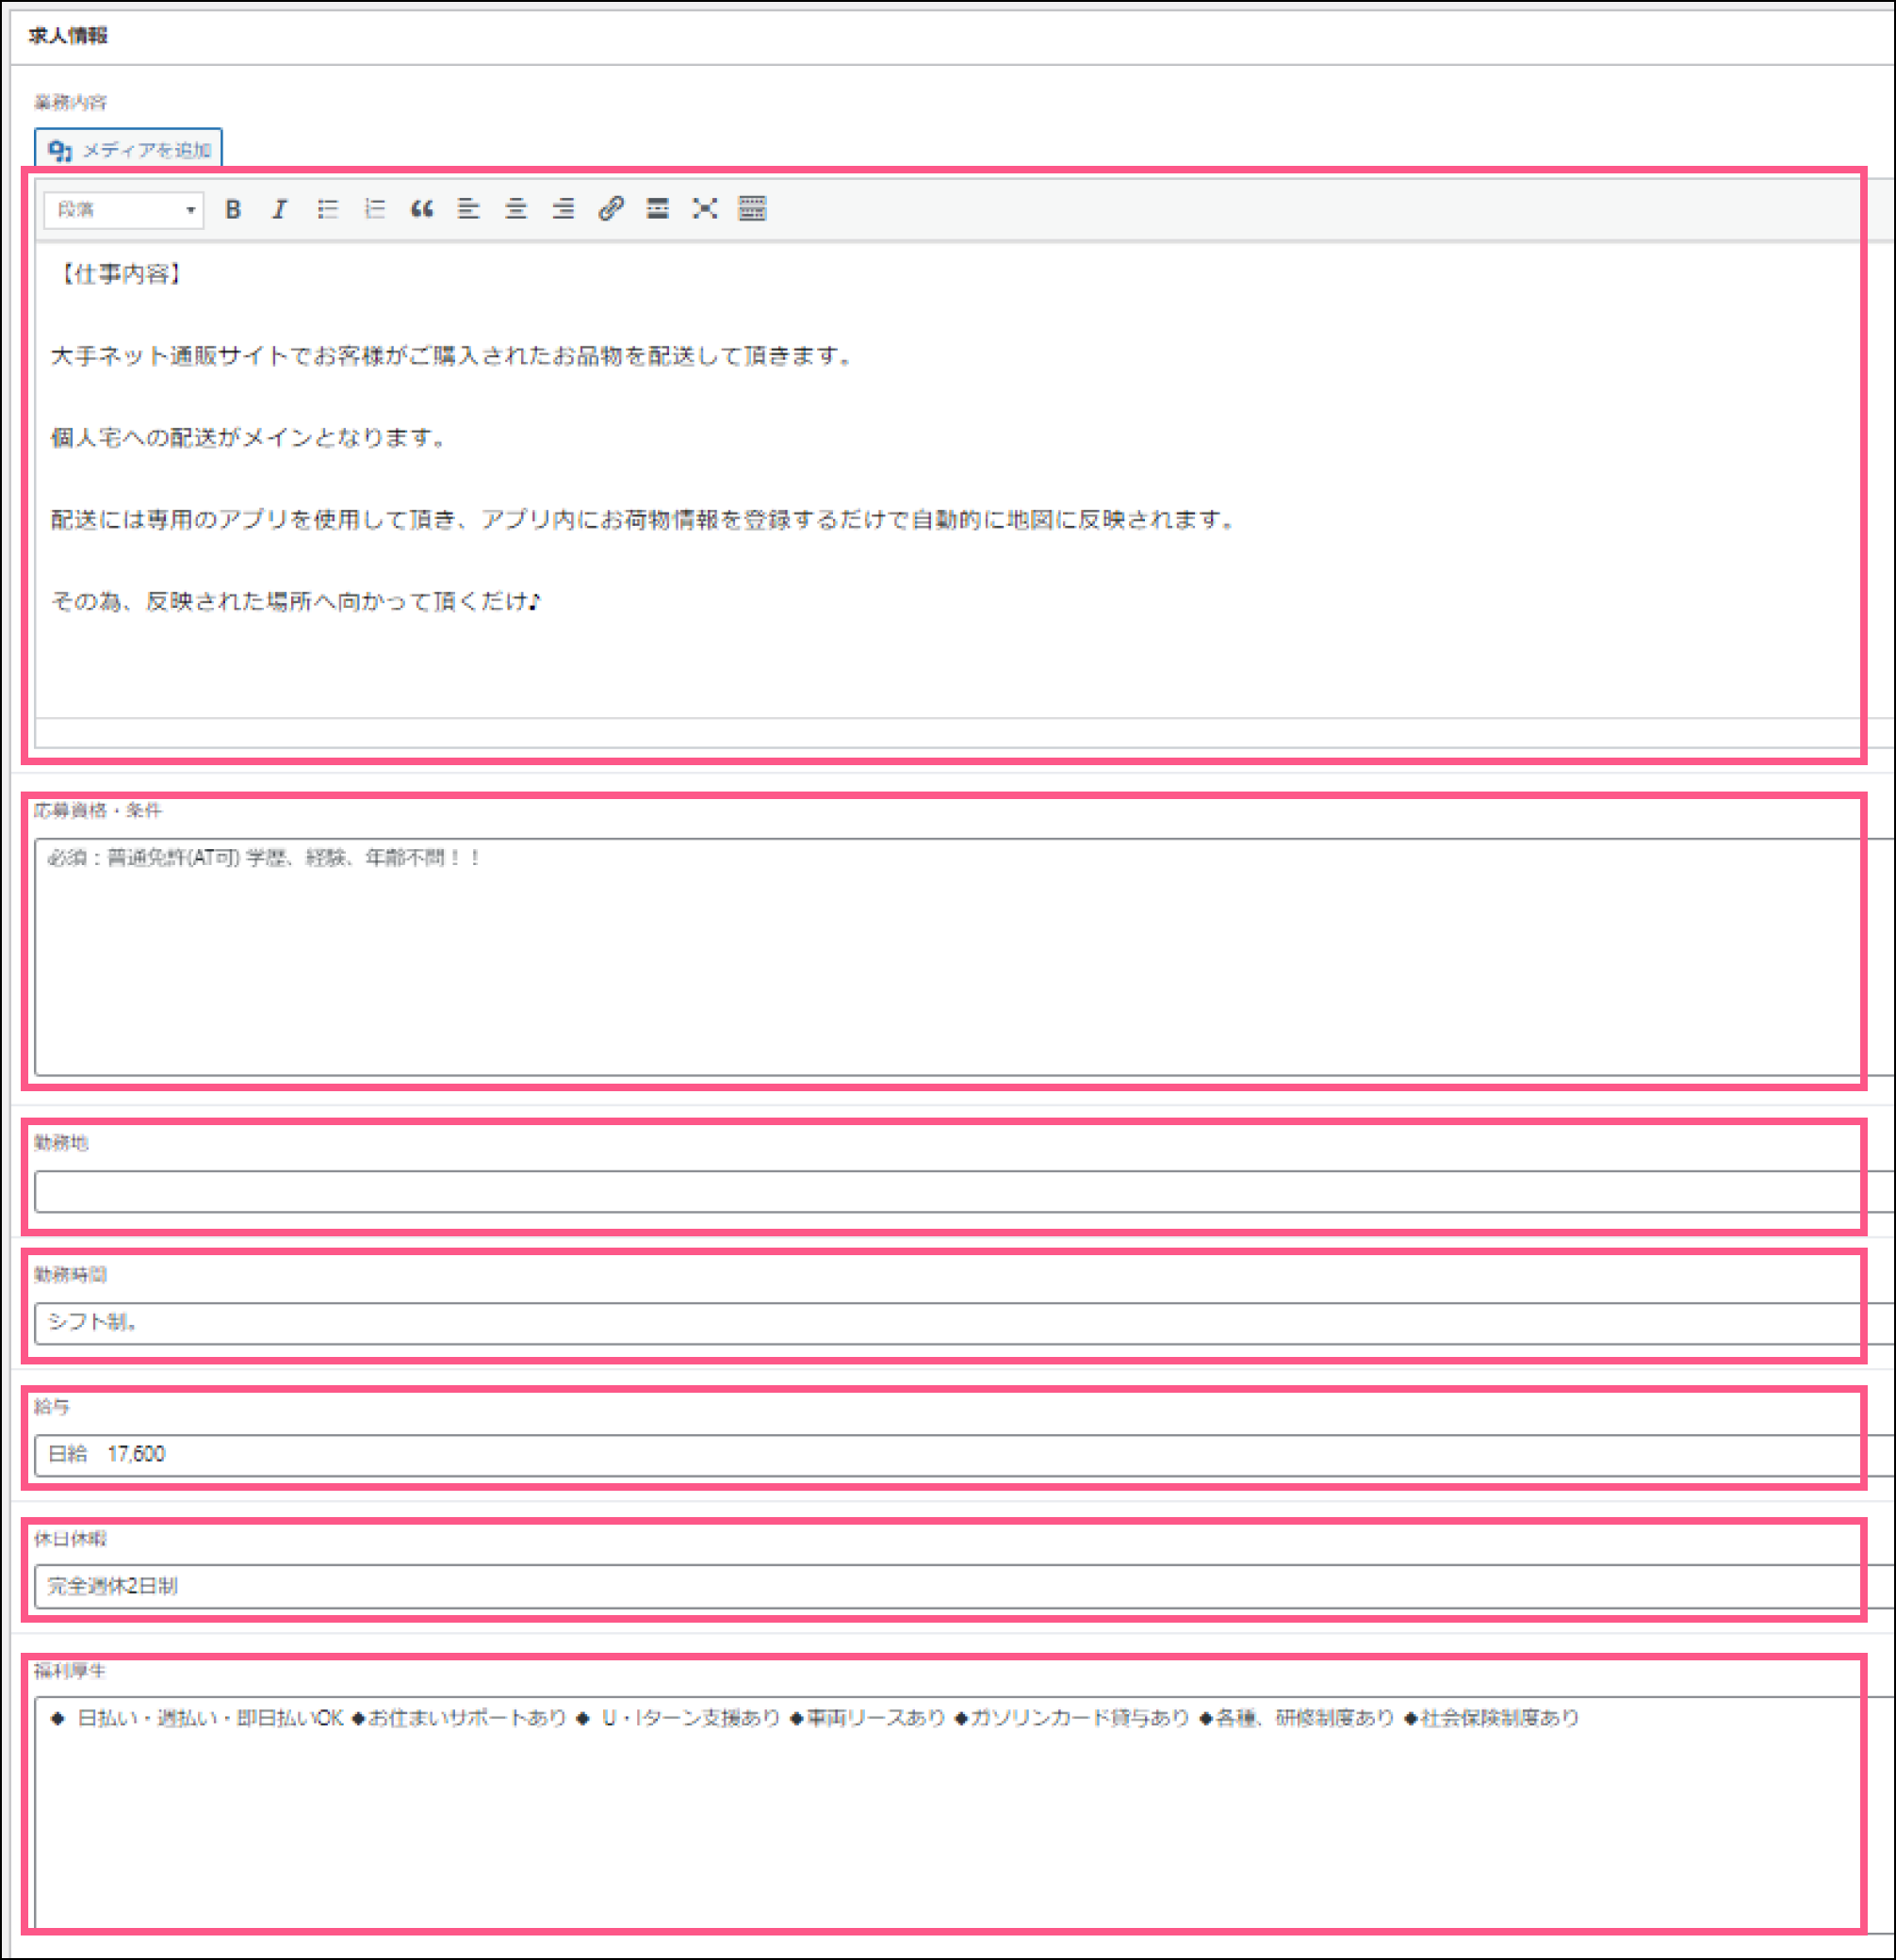
例)「求人投稿」というカスタム投稿があった場合
仕事内容、応募条件などの情報をカスタムフィールドに設定
→投稿者さんが簡単に編集できるようになります
カスタムフィールド作成の仕方「ACF」Advanced Custom Fieldsの使用法
1)「ACF」Advanced Custom Fieldsをダウンロード
▽「新規プラグインを追加」より、「Advanced Custom Fields」をダウンロード → 「有効化」

2)フィールドグループを作成
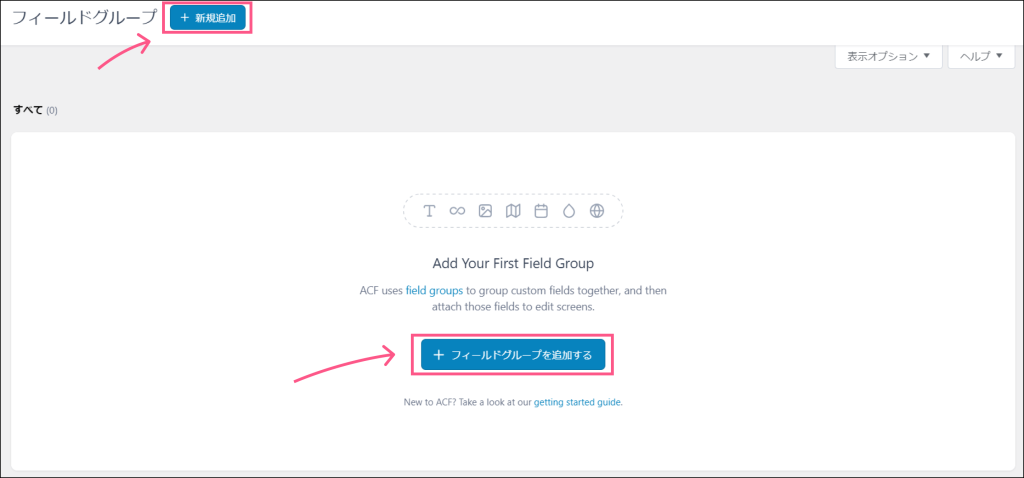
〇フィールドグループを新規作成
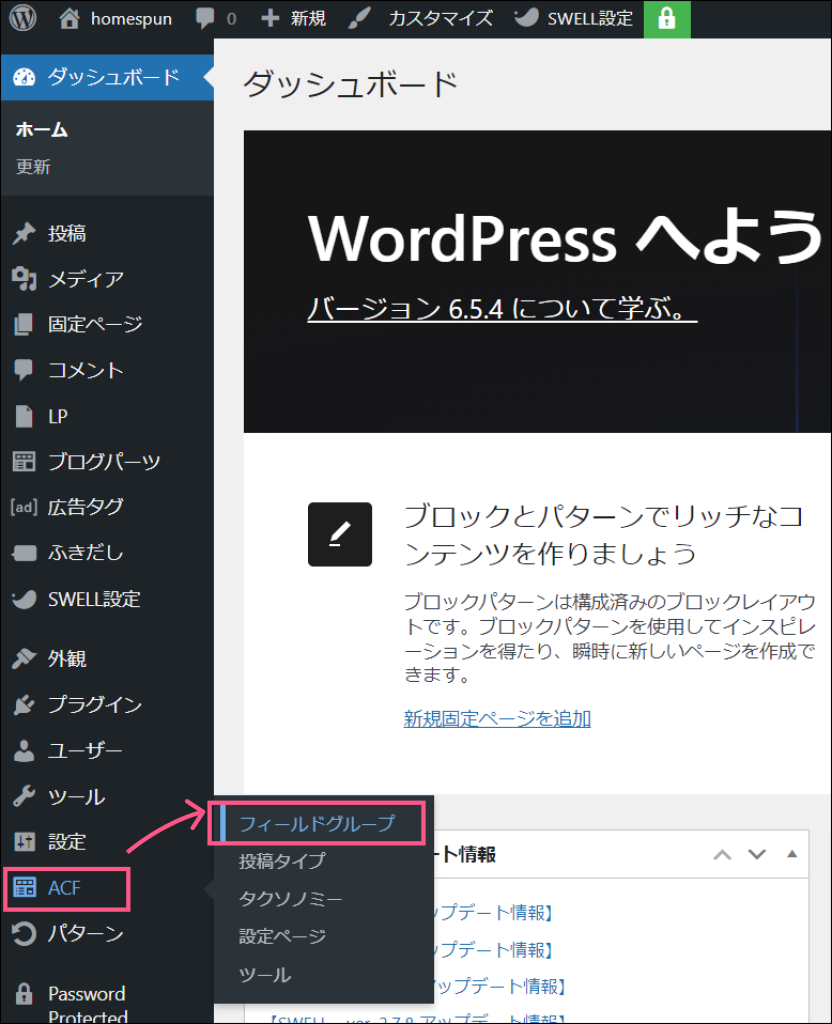
ワードプレス管理画面メニュー「ACF」より「フィールドグループ」をクリック
▽「新規追加」か「フィールドグループを追加する」をクリック
〇フィールドグループの各フィールドを入力
▽フィールドの各項目を入力
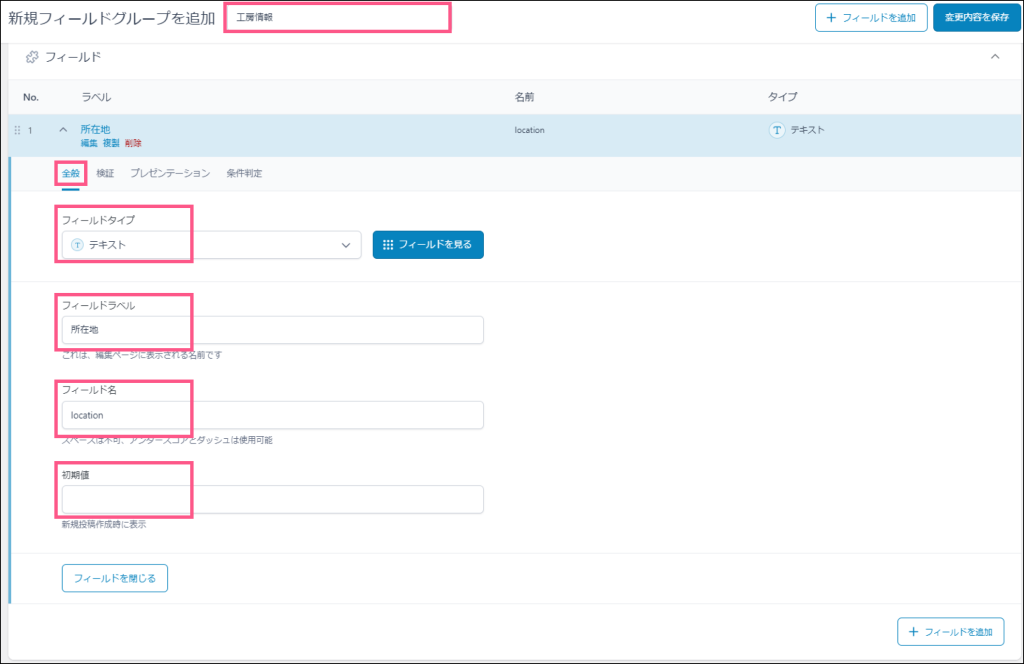
例)
- フィールドグループタイトル:工房情報
- 全般
- フィールドタイプ:テキスト
- フィールドラベル:所在地
- フィールド名:location
- 初期値:未記入
- 全般
| フィールドタイプ | テキスト、画像、ラジオボタン等あります |
| フィールドラベル | 編集ページに表示されます |
| フィールド名 | テンプレートファイルを編集する際に使用 |
| 初期値 | 新規投稿作成時に表示されます |
▽フィールドグループの各項目を入力
例)
- フィールドグループタイトル:工房情報
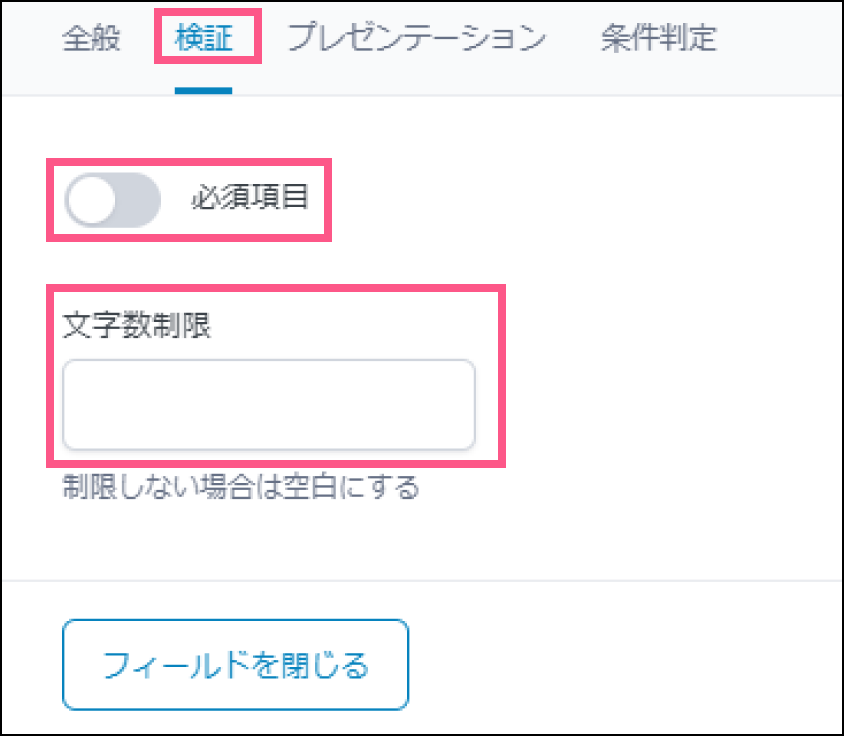
- 検証
- 必須項目:未記入
- 文字数制限:未記入
- 検証
▽「フィールドを追加」

同様の手順で下記の通りフィールドを入力しました
例)
- 全般
- フィールドタイプ:画像
- フィールドラベル:アイコン画像
- フィールド名:img_icon
- 戻り値の形式:画像配列
- ライブラリ:すべて
〇フィールドグループの設定
カスタムフィールドを表示するために「ルール」を設定できます
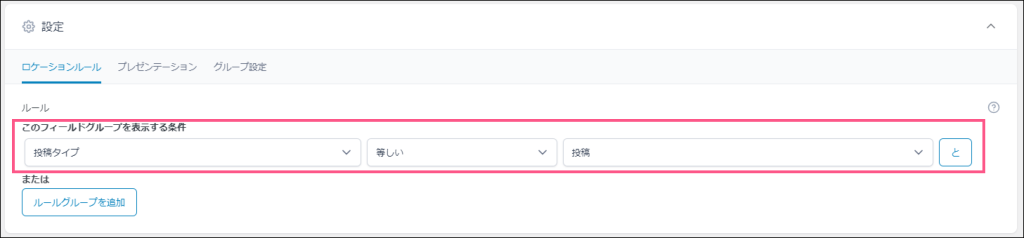
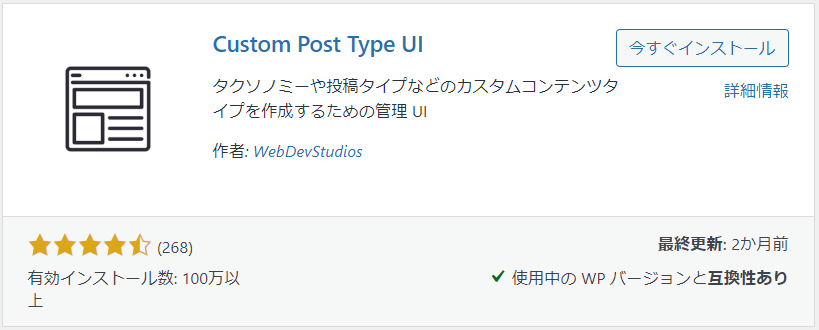
プラグイン「Custom Post Type UI」で作成したカスタム投稿タイプのときだけ表示することもできます
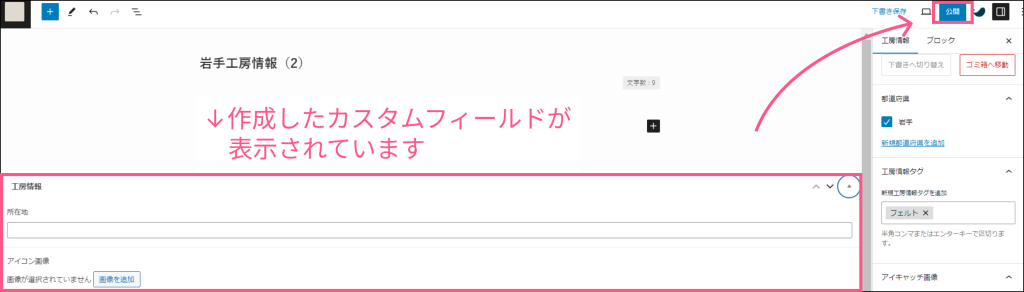
3)カスタムフィールドを使用した記事を投稿する
▽作成したカスタムフィールドが表示されるので、入力し記事を公開
4)作成した記事カスタムフィールドの表示
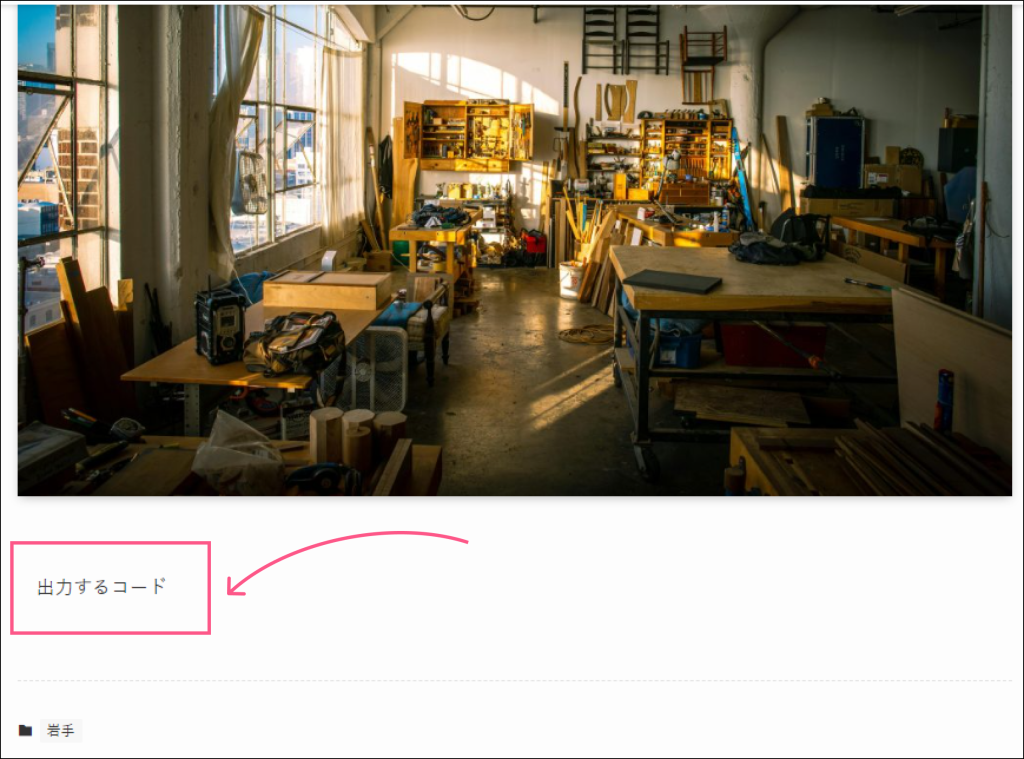
方法(1)WordPressテーマ「SWELL」使用している場合、フィルターフックによる方法がオススメです
▽functions.phpを編集(ひとまずフィルターフックの出力を確認)
add_filter('the_content', function() {
	if (is_singular('workshop')) {
		$html  = $the_content;
		$html  .= '出力するコード';
		return $html ;
	}
});
下記の通り$the_content直下に表示させることができます
▽functions.phpを編集(カスタムフィールドの出力)
add_filter('the_content', function($the_content) {
	if (is_singular('workshop')) {

		// ACFで設定した画像を取得 ※関数内で宣言
		$Landscape = get_field('landscape');
		$ImgIcon = get_field('img_icon');

		$html  = $the_content;
		$html .= '<div class="work-shop-landscape" style="background: linear-gradient(rgba(255, 255, 255, 0.4), rgba(255, 255, 255, 0.4)), url('.$Landscape['url'].');"></div>';
		$html .= '<img class="work-shop-img-icon" src="'.$ImgIcon['url'].'">';
		$html .= '<p>'.get_field('location').'</p>';
		return $html;
	}

	// トップページで何も表示されなくなるため
	else {
		return $the_content;
	}
});
Advanced Custom Fieldsの画像フィールドの使い方と応用方法
https://usagicode.com/wordpress/how-to-use-acf-image-field/
【SWELL 】カスタムフィールドの値を詳細記事テンプレート(single.php)に表示するカスタマイズ
https://note.com/swell_mania/n/n9d7f8ea13eb2
方法(2)foreach文を入れる場合方法(1)の記述方法がわからないので、アクションフックを使用した出力方法で
▽functions.phpを編集
add_action('the_content', function($html) {
	if(is_singular('workshop')) {
		// ACFで設定した画像を取得 ※関数内で宣言
		$Landscape = get_field('landscape');
		$Icon = get_field('img_icon');
		$Loction = get_field('location');
		?>
		<div class="work-shop-landscape" style="background: linear-gradient(rgba(255, 255, 255, 0.4), rgba(255, 255, 255, 0.4)), url(<?php echo esc_attr($Landscape['url']); ?>);"></div>
		<div class="work-shop-headerInfo">
			<div class="work-shop-icon-wrapper"><img class="work-shop-icon" src="<?php echo esc_attr($Icon['url']); ?>"></div>
			<div class="work-shop-icon-desc">
				<div class="work-shop-tag">
					<?php
						$terms = get_the_terms($post->ID, 'area');
						if ($terms) {
							foreach ($terms as $term) {
								// echo '<a class="tagc-area" tag-id="' . $term->term_id . '" href="' . get_permalink() . '">' . $term->name . '</a>';
								// aタグのリンクを無効
								echo '<a class="tagc-area" tag-id="' . $term->term_id . '" href="">' . $term->name . '</a>';
							}
						}
						$terms = get_the_terms($post->ID, 'tag-workshop');
						if ($terms) {
							foreach ($terms as $term) {
								// echo '<a class="tagc-tag-workshop" tag-id="' . $term->term_id . '" href="' . get_permalink() . '">' . $term->name . '</a>';
								// aタグのリンクを無効
								echo '<a class="tagc-tag-workshop" tag-id="' . $term->term_id . '" href="">' . $term->name . '</a>';
							}
						}
					?>
				</div>
				<!-- /.work-shop-tag -->
				<div class="work-shop-location"><?php echo esc_attr($Loction); ?></div>
				<!-- /.work-shop-location -->
			</div>
			<!-- /.work-shop-icon-desc -->
		</div>
		<!-- /.work-shop-headerInfo -->
		<?php
	}

	// トップページで何も表示されなくなるため
	else {
		return $html;
	}
});【WordPress】本文入力欄を非表示にする方法
参考サイト
【完全版】Snow Monkeyでカスタム3兄弟を実装する
https://ippei-kusakari.com/web/snow-monkey/custom-post
Advanced Custom Fieldsの画像フィールドの使い方と応用方法
https://usagicode.com/wordpress/how-to-use-acf-image-field/
【SWELL 】カスタムフィールドの値を詳細記事テンプレート(single.php)に表示するカスタマイズ
https://note.com/swell_mania/n/n9d7f8ea13eb2
【サンプルコード付き】カスタムフィールドの値を一覧ページに表示するカスタマイズ
https://webrent.xsrv.jp/display-customfield-on-archive-pages