目次
1)アカウント作成、ログイン
下記URLよりアカウント作成後、GitHubにログイン
https://github.com
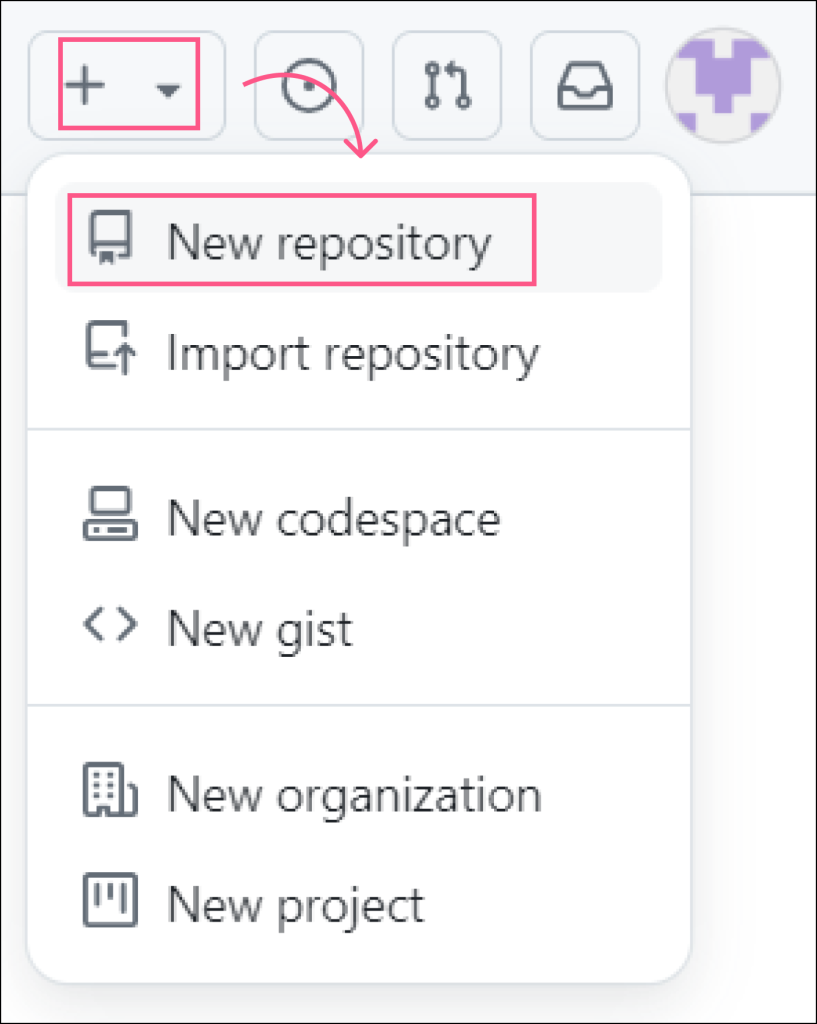
2)リポジトリ作成
画面右上の「+」マークから「New repositoriy」をクリック
リポジトリ名を決める
リポジトリ名でURLが決まります
| 1.アカウント名.github.io | https://アカウント名.github.io |
| 2. 1.以外のリポジトリ名 | https://アカウント名.github.io/リポジトリ名 |
▽今回はURLがシンプルになるので、リポジトリ名は「アカウント名.github.io」としました
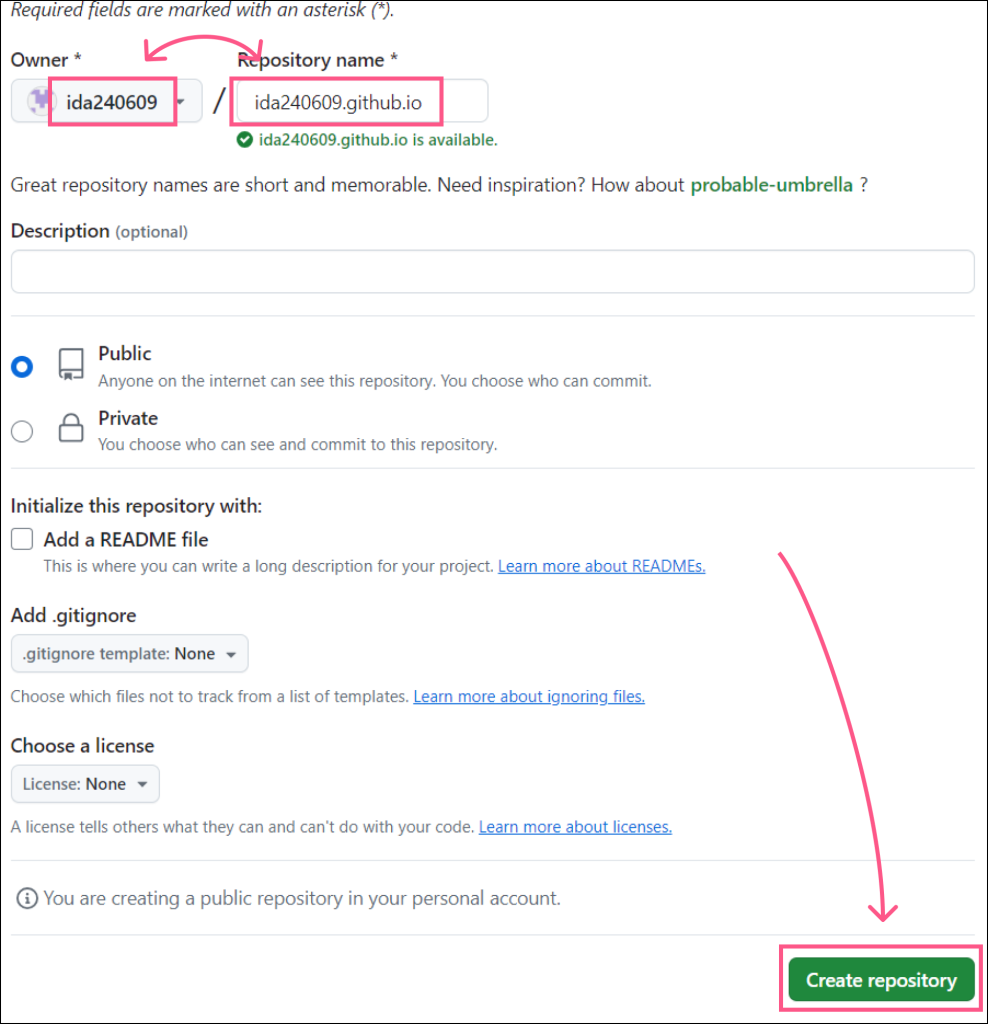
内容を入力したら「Create repository」
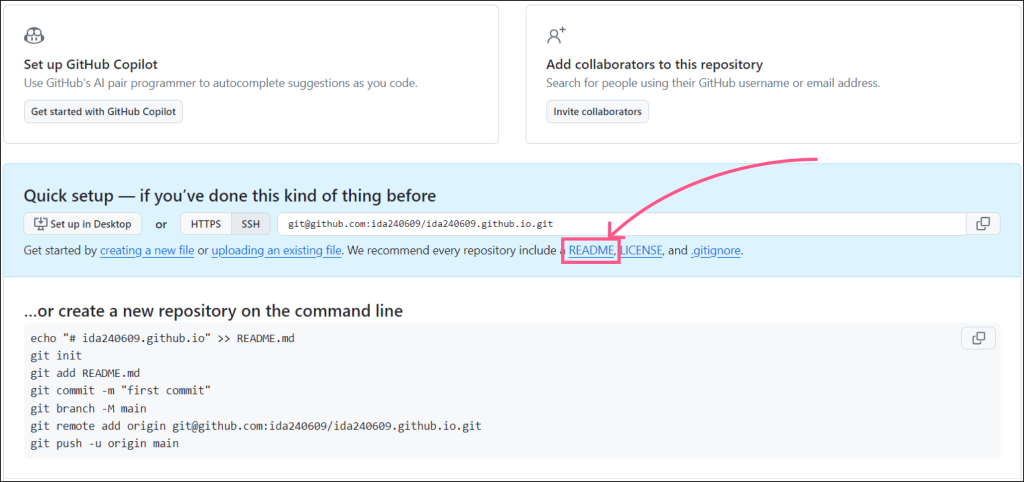
「README.md」について
▽リポジトリ作成後の画面で「README」のリンクがあるのでクリック
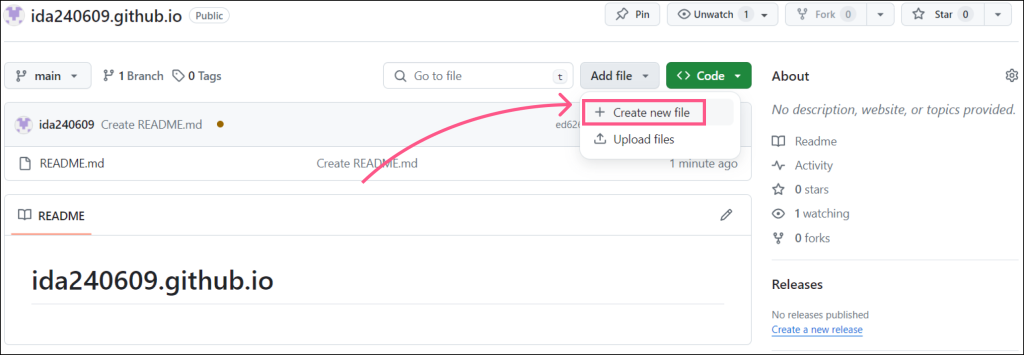
▽何も入力せず「Commit changes…」
※「README.md」はリポジトリの説明を記載するためのファイルです

ファイルのアップロード
▽「Add file」→「Create new file」をクリック
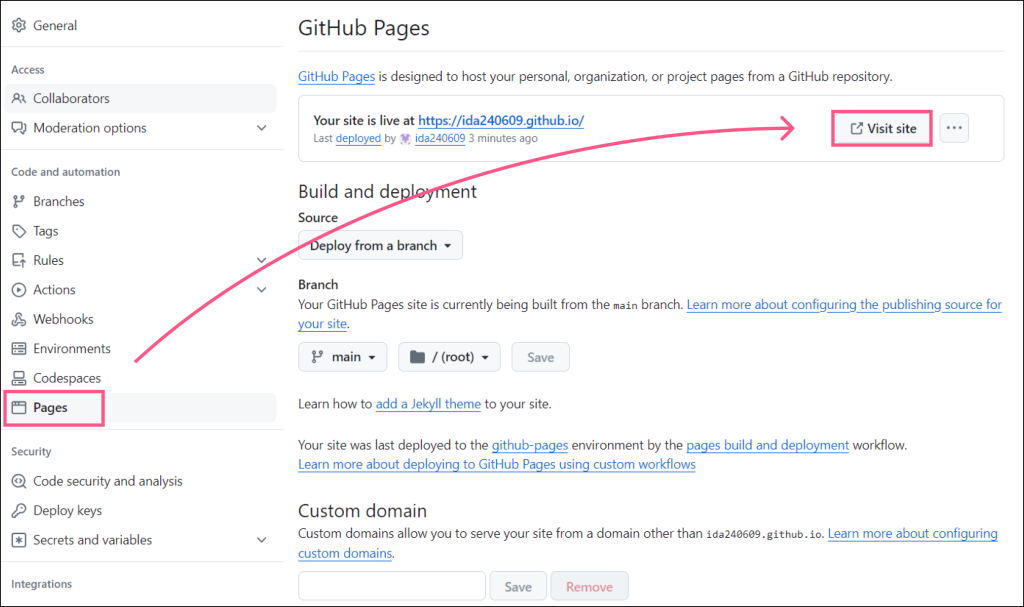
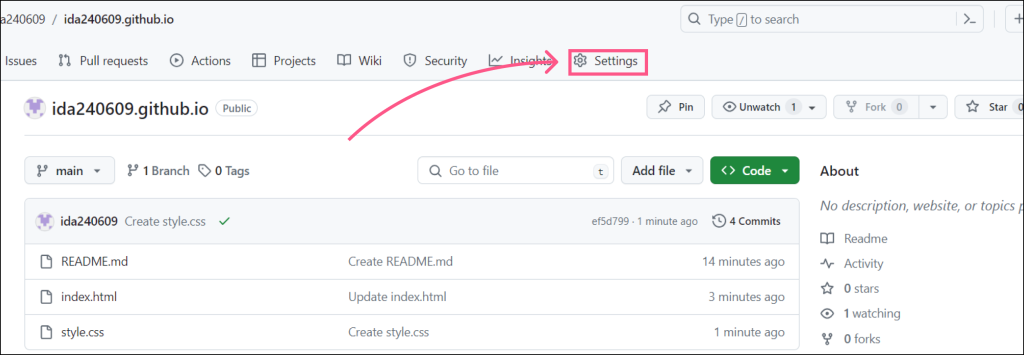
Webサイトを表示する
▽「Settings」をクリック
▽「Pages」→「Visit site」をクリックしてサイトの表示が確認できます